This article contains an affiliate links to products. Wanderer Mom is an Amazon Associate and we earn from qualifying purchases through affiliate links at no extra cost to you. Thoughts and opinions in this article are solely Wanderer Mom’s. We only share products which we love and had experienced with.Thank you for supporting this blog.
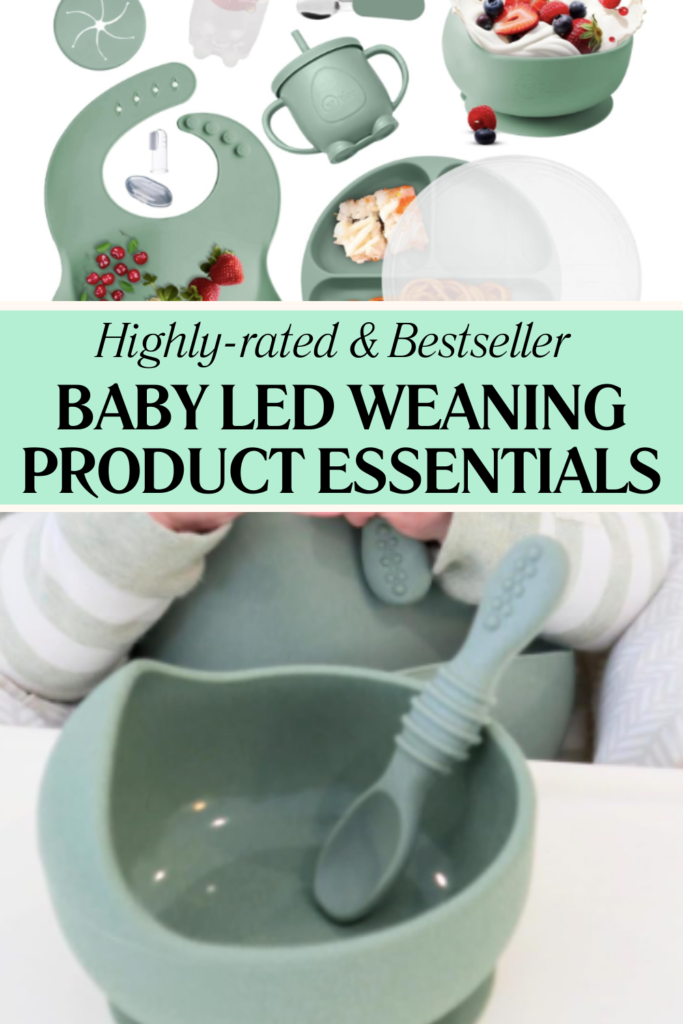
When I first heard about Baby Led Weaning (BLW), it was an entirely new concept to me. I didn’t use BLW with my now 13-year-old daughter. It wasn’t until I spent countless hours watching YouTube videos during my pregnancy with my new baby that I became familiar with BLW. Here I laid out the benefits of BLW, sample BLW meal ideas, and BLW product essentials.
So, what exactly is Baby Led Weaning (BLW)?
Baby Led Weaning means letting your baby feed themselves from the start. You offer your baby soft food options, such as fruits, veggies, and even meat or fish, and let them explore and eat at their own pace.
You can start BLW as early as when your baby turns 6 months old. I introduced solid foods to my baby girl when she was about 5.5 months old. Her two teeth came in early, around 5 months, making her eager to try solids.
There are pros and cons to both BLW and traditional spoon-feeding. There’s no right or wrong method; it’s all about what works best for you and your baby. Trust your instincts, mama!
For my 7-month-old, I use a combination of BLW and traditional spoon-feeding, with BLW being our main method. Every day, I let my baby feed herself, but I also spoon-feed her chicken oat porridge, rice, or other soupy foods. Recently, I’ve been guiding her to hold the spoon herself, making sure she’s safe and doesn’t choke.
Benefits of Baby Led Weaning (BLW) for babies 6 months and up:
1. Encourages Independence: Babies learn to feed themselves, which promotes independence and self-regulation of hunger.
2. Enhances Motor Skills: Picking up food and bringing it to their mouth helps develop fine motor skills and hand-eye coordination.
3. Promotes Healthy Eating Habits: Babies exposed to a variety of textures and tastes may be less likely to be picky eaters later on.
4. Supports Family Meals: Babies can join family mealtimes, eating the same foods (appropriately prepared), which can make meals more enjoyable and less time-consuming.
5. Reduces Risk of Overfeeding: Babies learn to recognize their hunger and fullness cues better, which can help prevent overeating.
6. Improves Oral Development: Chewing on a variety of textures can aid in the development of jaw strength and oral motor skills.
7. Encourages a Positive Relationship with Food: By exploring food at their own pace, babies can develop a positive and curious attitude toward eating.
Remember, always ensure the foods are safe and appropriate for your baby’s age to minimize the risk of choking.
Following BLW, I’ve noticed my baby enjoys her mealtime with us. Each day, she gets better at picking up foods with her tiny fingers. Some of her favorite foods are avocado, carrots, broccoli, strawberries, and cherries.
My 7-Month-Old Baby’s Favourite BLW Meals:
Take a pic of my baby’s favourite foods below:
• Breakfast: Soft avocado slices and banana chunks
• Lunch: Steamed carrot sticks and small pieces of broccoli
• Dinner: Shredded chicken and soft-cooked sweet potato wedges
• Snacks: Halved strawberries and pitted cherries (cut into small pieces)
Watching my baby explore new foods and textures is a delightful experience. It’s amazing to see her growing independence and developing a healthy relationship with food. Happy weaning, mamas!
This article contains an affiliate links to products. Wanderer Mom is an Amazon Associate and we earn from qualifying purchases through affiliate links at no extra cost to you. Thoughts and opinions in this article are solely Wanderer Mom’s. We only share products which we love and had experienced with.
As a mom, you know that summer can be a challenging time to keep your teens engaged and productive. If you’re looking for ways to encourage your teen to develop new skills, gain some independence, and even earn a little extra money, why not suggest starting a digital business? Here are 20 fun and easy digital business ideas that are perfect for teens aged 10 to 15.
1. YouTube Channel
Does your teen love gaming, cooking, or DIY crafts? Starting a YouTube channel can be a great way for them to share their passions with the world. They can create and edit videos, and who knows? They might even become the next big YouTube star!
2. Blogging
If your teen loves to write, starting a blog can be a fantastic outlet. Whether it’s about sports, books, or hobbies, blogging helps develop writing skills and can attract a community of like-minded readers.
3. Graphic Design
Using free tools like Canva, your teen can create custom graphics for friends or local businesses. They can design logos, social media posts, and more, all while exploring their creativity.
4. E-Book Author
Encourage your teen to write a short story, guide, or even a collection of their best jokes. They can self-publish their e-book on platforms like Amazon Kindle Direct Publishing and share their work with the world.
5. Social Media Management
Managing social media accounts for a family member’s small business or a community group can teach your teen valuable marketing skills. They can plan posts, create content, and track engagement.
6. Podcasting
If your teen enjoys talking about their favorite topics, starting a podcast is a great idea. They can record, edit, and share their episodes on platforms like Spotify or Apple Podcasts.
7. Digital Art
For the artistically inclined, creating and selling digital artwork can be a rewarding venture. Platforms like Etsy or Redbubble allow them to sell digital prints and custom art pieces.
8. Online Tutoring
If your teen excels in a particular subject, they can offer online tutoring sessions. Using video conferencing tools, they can help other students and share their knowledge.
9. App or Game Development
Learning basic coding and developing a simple app or game is a fantastic way for your teen to dive into the tech world. Platforms like Scratch or App Inventor are user-friendly and perfect for beginners.
10. Virtual Event Planning
Hosting virtual events like game nights, talent shows, or educational webinars can be both fun and profitable. Your teen can use tools like Zoom or Google Meet to connect with participants.
11. E-commerce Store
Setting up an online store on platforms like Etsy, eBay, or Shopify allows your teen to sell products they create or curate. This teaches them about e-commerce and customer service.
12. Website Creation
Building simple websites for local businesses or personal projects can be a great way for your teen to learn web development. Platforms like Wix or WordPress make it easy to get started.
13. Online Course Creation
If your teen is knowledgeable in a particular area, they can create an online course or tutorial series. Platforms like Teachable or Udemy allow them to share their expertise with others.
14. Animation
Creating short animated videos or GIFs can be a fun and creative outlet. Free tools like Blender or Toontastic are perfect for beginners and can help your teen share their animations online.
15. Virtual Assistant
Offering virtual assistant services can teach your teen about organization and responsibility. They can help with tasks like email management, research, or social media posting for small businesses.
16. Digital Marketing
Learning the basics of SEO, content creation, or online advertising allows your teen to offer digital marketing services to local businesses, helping them gain real-world marketing experience.
17. Online Photography Portfolio
Creating a digital portfolio of their photography work can help your teen attract clients for photo editing or digital photo album creation services.
18. Digital Scrapbooking
Creating and selling custom digital scrapbooks allows your teen to use their creativity while making cherished keepsakes for customers. Digital scrapbooking software makes it easy to design unique pages.
19. Virtual Book Club
Starting a virtual book club can be a great way for your teen to connect with others who love reading. They can organize meetings, lead discussions, and create reading guides.
Encouraging Entrepreneurship
Encouraging your teen to start a digital business can help them develop important skills like creativity, responsibility, and problem-solving. Plus, it’s a great way for them to stay engaged and productive during the summer. Which of these ideas will your teen try first? Let us know in the comments below!
Don’t forget to share this post with other moms looking for fun and productive activities for their teens. Happy hustling!
Resources
The authors of the popular financial guide, Rich Dad Poor Dad, have adapted their advice for teenagers.
This book aims to equip young people with the financial knowledge and confidence needed to succeed in today’s uncertain job market.
It teaches teens practical money management skills, encouraging them to think like entrepreneurs and investors rather than just wage earners.
The book’s easy-to-understand style makes complex financial concepts accessible to a younger audience, providing essential lessons often overlooked in schools and homes.
Teach your kids about money early! This book helps kids 8 to 12 learn how to save, invest, and grow their money. It’s fun and easy to understand, with tips on stocks, bonds, and smart money choices
This article contains an affiliate links to products. Wanderer Mom is an Amazon Associate and we earn from qualifying purchases through affiliate links at no extra cost to you. Thank you for supporting this blog which allows me to continue creating free content. Thoughts and opinions in this article are solely Wanderer Mom’s. We only share products that we love and had experienced with.
Navigating the teenage years can be a challenge, especially when it comes to setting schedules. The key to success is creating a collaborative environment where both you and your teenager feel heard and respected. Here’s how to make it happen.
Step 1: Open the Conversation
Start by asking your teenager, “Do you have any plans this summer?” If they respond with “no” or “I don’t know,” use this as an opportunity to introduce the idea of a summer schedule. You could say, “Would you like to have a summer schedule that’s fun, productive, and exciting?” This approach shows that you care about their happiness and want to ensure they have a fulfilling summer.
Step 2: Collaborate on the Schedule
Once they’re open to the idea, suggest, “I’ll help plan your schedule and would love for you to look at it and add any activities you’re interested in.” This makes them feel involved and valued, rather than feeling like they’re being forced into a routine. When teens feel they have a say in their plans, they’re more likely to take ownership and be enthusiastic about their responsibilities.
Step 3: Follow Through
As a parent, it’s crucial to follow through on your promises. That same night, draft a summer schedule and discuss it with your teenager the next day. Let them know that the schedule is flexible and can change based on circumstances, including considerations for other family members, like a younger sibling. Setting realistic expectations and goals that they are happy with can prevent feelings of pressure and foster a sense of discipline and initiative.
Get exclusive price by being a Prime member today!
Our Experience
As a mom of both a teenager and an infant, I understand the challenges of balancing different needs and routines. My children have a significant age gap, which can make following a strict routine difficult. However, since we started our summer schedule, my teenager has shown enthusiasm and commitment. It’s heartening to see her take the initiative and feel happy about her day.
Resources
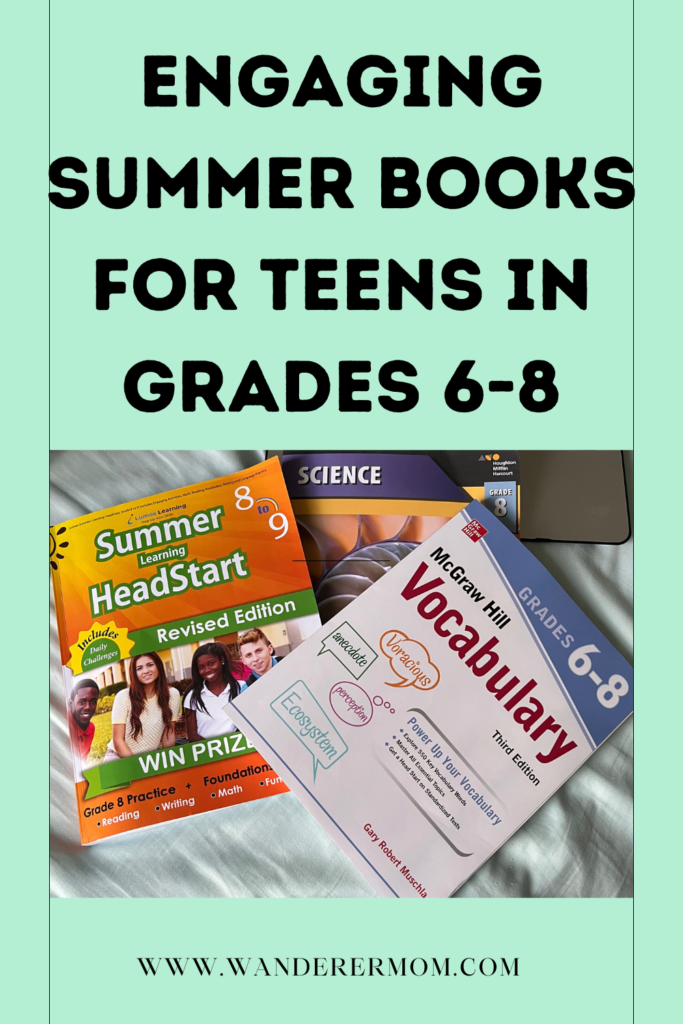
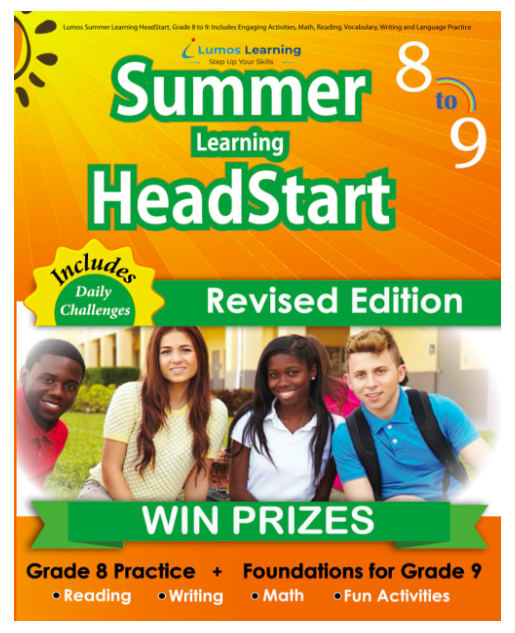
To support our schedule, I bought books from Amazon and a Canadian curriculum book. For math, we use excellent educational videos on YouTube that make the subjects easier to understand.
Do you also have a teenager and an infant? How do you manage their schedules? Share your experiences and tips in the comments below.
This article contains an affiliate links to products. Wanderer Mom is an Amazon Associate and we earn from qualifying purchases through affiliate links at no extra cost to you. Thoughts and opinions in this article are solely Wanderer Mom’s. We only share products that we love and had experienced with.
This article contains an affiliate links to products. Wanderer Mom is an Amazon Associate and we earn from qualifying purchases through affiliate links at no extra cost to you. Thoughts and opinions in this article are solely Wanderer Mom’s. We only share products which we love and had experienced with.
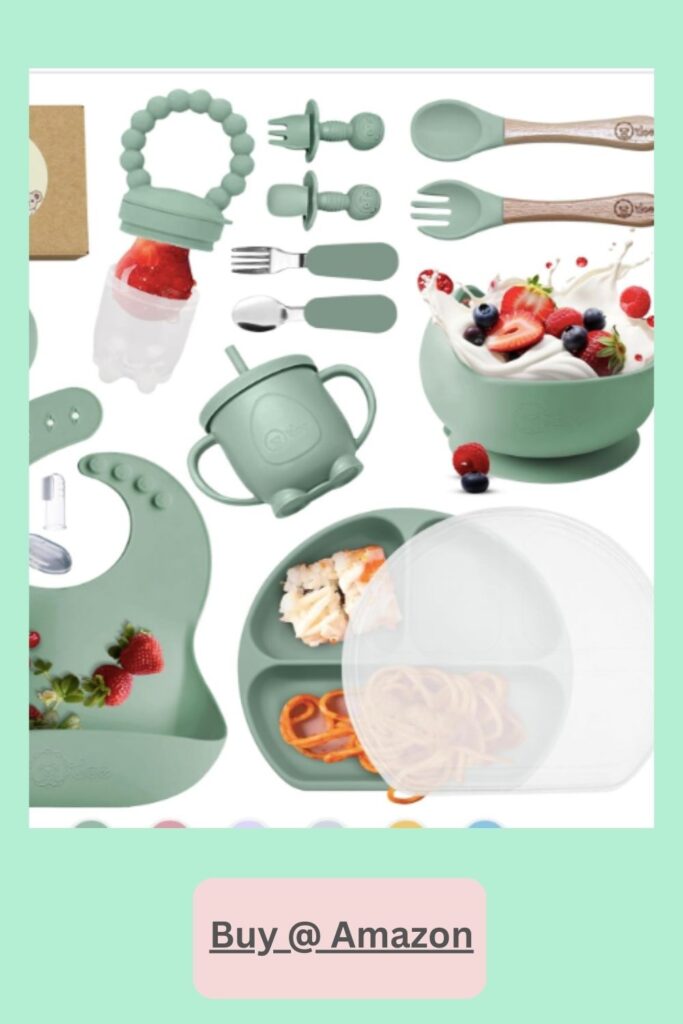
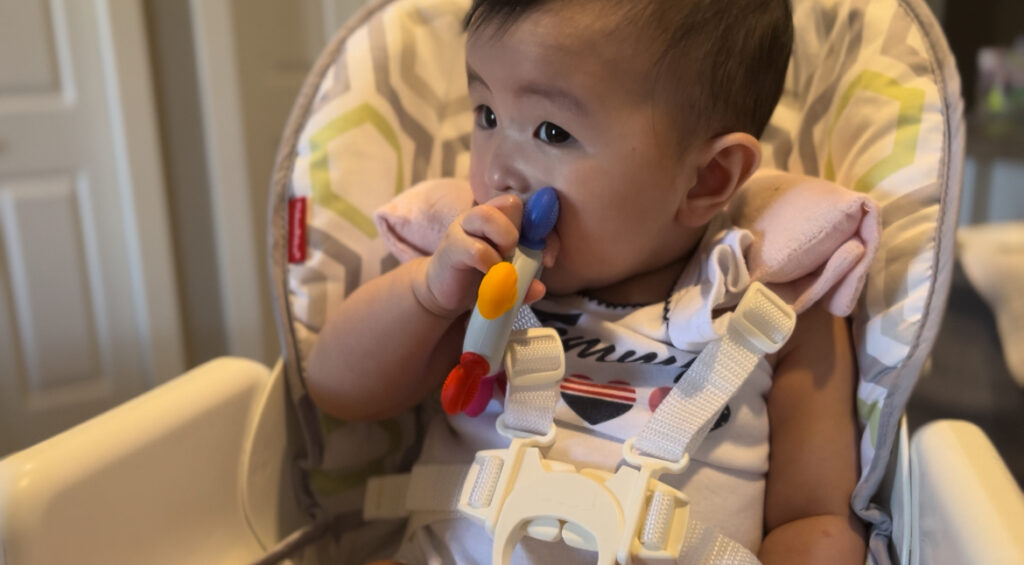
When my baby started teething at 5 months old, it felt like she wanted to bite everything in sight! From her stuffed toys to books, nothing was safe from her little gums. I quickly learned that having a variety of good teethers was essential. After trying out numerous options, I discovered four teething toys that she absolutely loves. Now that she’s 7 months old, these toys are still her go-to for soothing those sore gums. I’m sharing them here in case you’re looking for something that actually works.
Don’t Be Fooled by Fancy Teethers!
When I first shopped for teethers, I was guilty of going for the cutest, fanciest ones. I thought they’d be the best, but my wallet and I quickly learned that looks aren’t everything. The main thing you want to look for in a teether is whether it’s non-toxic and safe for your baby.
Our Top 4 Teething Toys:
Here are the teething toys that my baby loves to bite and chew on. While she tried a few fancy ones, these four are the ones she always goes back to. They’ve been a lifesaver in soothing her gums, and I hope they can help your baby too!
This teether is made from 100% food-grade silicone and natural beech, ensuring it’s non-toxic, BPA-free, and completely safe for babies. Its lightweight and flexible design make it easy for little hands to grab and chew, helping with motor skills and teething pain.
What I love about this teether is that it has different bumps and textures, providing a fun and soothing biting experience. Cleaning is simple—just wash with mild soapy water or boil to sterilize (except for the wooden ring, which shouldn’t be boiled). You can also chill it in the fridge for extra relief.
One thing to note though, my baby was able to fully grasp this teether when she turned 6 months but not when she was only 5 months old. Now it’s her ultimate favourite teether. I always attach it in her high chair, in her jumper and play pen which is why it’s good to have at least 2 or 3 of this 🙂 I also bring it whenever we are going out.
Haakaa’s award-winning Silicone Feeder is perfect for introducing solids safely. It has a pouch with tiny holes that only let small food pieces through, reducing the risk of choking. You can freeze breast milk or other foods and put them in the pouch to soothe your baby’s teething discomfort. The feeder’s silicone bunny-like top has textures that gently massage sore gums.
The Feeder is designed with an easy-to-hold ring for little hands, promoting self-feeding and improving hand-eye coordination. It features a safe raised rim design to ensure it stays closed and secure while your baby munches away happily.
The one I bought comes with a small food tray which fit perfectly into the Feeder Pouch, making meal prep a breeze. I normally use the tray to freeze avocado because it’s my baby’s favourite. Cleaning is also easy with fewer parts to assemble—just boil or wash with mild soapy water. There are no fiddly pieces, mesh, or clips to harbor germs.
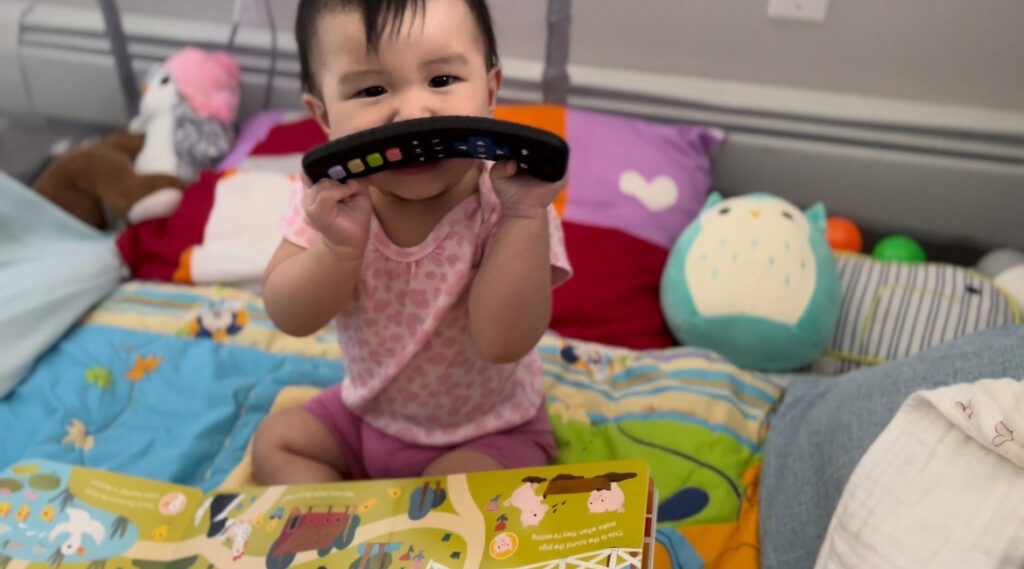
These baby teething toy is made from food-grade silicone. They can handle extreme temperatures, so you can boil, steam, or refrigerate them—whatever works best for you!
Cleaning this is a breeze, and they’re durable enough to last through all the chewing your baby can dish out. The textured surface is perfect for soothing sore gums and relieving discomfort.
This teether isn’t just great for teething—they’re also fantastic for early education. Shaped like TV remotes, they help your baby recognize colors and develop their learning skills. Plus, they’re just plain fun to play with!
Its design helps massage your baby’s swollen gums, providing much-needed relief during those tough teething times. Perfect for babies aged 3 to 24 months, this teether will quickly become a favourite!
No more chewing on hands! The Malarkey Kids Munch Mitt keeps your baby safe from scratching themselves, irritating their skin with saliva, and developing blisters from thumb-sucking. This award-winning teething mitten is a top choice from Baby Maternity Magazine.
Say goodbye to fussiness! With its unique textured and ergonomic design, this teething glove relieves baby’s tender gums and turns grumpy moments into smiles quickly.
The mitt also offers great sensory stimulation. The crinkling sounds and black-and-white color contrast help stimulate your baby’s sound and visual senses during early growth. Plus, it’s fun enough to keep them entertained while you handle household chores.
Invented by a mom, the Munch Mitt is made with 100% high-quality, food-grade silicone. It’s BPA and phthalate-free.
Cleaning is a breeze. The Malarkey Kids hand mitts are machine washable and come with an adjustable strap to keep them from dropping on the ground. The soft, breathable fabric absorbs drool, saving you time and money on laundry.
I hope this list helps you find the perfect teething toy for your little one. Happy teething!
Starting a new life in Canada as an international student is exciting but it can also be overwhelming. And so, for this reason, it’s easy to lose track of your family goals and financial goals especially when you are swamped with school projects, part-time jobs, looking after your kids, and the whole process of obtaining a PR. (Side note) This post is long over due. I was supposed to post this last November but life got in the way (big time!).
Anyways, I’ve list down some steps you can take or probably assess to get your life in Canada right onto a good start. I hope you will find these tips helpful.
Remember the sleepless nights, anxiety, all the emotional turmoil and financial stresses you had to go through to make it here in Canada as an international student with your whole family? Make the journey all worth it. Goal is there for a reason. Goal experts say that if you don’t write your goal, then it is merely a wish. So, take the time to write your goals on your notebook or in the notes of your phone if you are not the type of person who likes writing down in notebook. What are your goals apart from obtaining a PR?
2.Keep track of your Numbers.
It doesn’t matter what happens in the past or if you feel you are not good at managing money. It’s important to know the $$$ that’s coming in monthly but is also equally important to know the $$$ that’s coming out. Having a financial tracker or a budgeting app is helpful. If you are new in the budgeting or money management, you can start by using an excel sheet or a notebook. Write down the following:
3. Build up your emergency funds.
You can’t run away from financial obligations. Whether it’s paying for the survival necessities, debt or loans, or gifts/gratuities. Money continuously flows. As an international student or a new immigrant, the best financial step you can take if you want to start your life on a good ground is to build up your emergency funds. If you already have an emergency funds set aside, well and good for you. Otherwise, take this opportunity to start. It doesn’t matter if you are holding a free health card or not paying any tuition fee for your kids. Emergency funds is for unexpected things so you don’t have to touch your investment money for your retirement and home.
4. Avoid unnecessary spending.
You don’t have to buy a new sofa or a new phone if your current one is still good and working. You don’t have to buy a lot of winter coats. Having two coats are enough. But you might be thinking of investing in a few good quality innerwear. Saying no to something you want when you know you don’t necessarily need it will serve you well later on. You should learn how to pep talk yourself when these circumstances happen.
5. Talk to your Bank or Financial Advisor.
Building a new life in Canada is a huge deal. Dreams will begin to realize when you have a few support group and mentor you can trust. I am sure you are thinking of buying a house sooner rather than later. You are also thinking of preparing for your kid’s college education, and your retirement. It is best to begin your financial journey in a new country off the good ground. Seek the advice from your banker or financial advisor or a trusted friend whom have experience or success you are also aiming. There are tax-free investment vehicles offered by the government. Explore, research, and seek advice regarding the following:
6. Monitor your Goals and Finances regularly.
The ability to monitor your goals and finances is a skill. If you are not yet good at it. You must start with the habit of doing so. Scientific studies say that it takes 90 days for a human being to develop a new habit. This means that, to be able to consistently track your goals, you need to be looking at it and monitoring it daily if not weekly for the next 90 days until you develop this good habit of doing so.
7. Discuss plans with your Accountability Partner or Trusted Advisor.
If you are not confident you can stick to your goals and trackers, then it’s best to engage with an accountability partner. Your accountability partner could be your spouse, or your trusted advisor. The intention of discussing your goals and action plans is for you to arrive at your desired state in the timeline you have set for yourself and your family.
8. Adjust actions plans if needed.
Don’t change your goals simply because things didn’t work out the first time or the second time. Look and asses at your action plans instead and ask yourself, why it didn’t work and what you need to improve or do to reach your goals. Know when to seek outside help when the circumstances require you to do so.
9. Look around and outside your comfort zone.
You can make your new life in Canada an enjoyable one. Don’t be afraid to go out there and meet new people. Don’t limit yourself into knowing only your co-international students. Meet other people like the locals, friends you know who have successfully settled down in Canada. By expanding your views, your horizon widens, and inspiration ignites.
10.Never neglect your spiritual growth.
Your biggest stronghold is your faith. Don’t get the busyness of life get in the way of enriching your body and soul. Enjoy the journey as an international student and a new immigrant. Learn to smell the roses along the way.
This post may contain affiliate links, which at no cost to you, Wanderer Mom may earn a small commission if you click through and make a purchase. Please read full disclosure here. Thank you for your love and support to this blog.
2021 is almost coming to an end and checking whether you are on track to achieving your goals and the good intentions you made will help pave the way for a great start to the new year 2022.
A few weeks ago, I reviewed the plans I made this 2021. I did not write it down but listed them all down on my phone. I wanted to check if I was on track and If I became true to myself and whether I was following the goals I set in early January 2021.
relationship goals
Looking back, it feels so great to know that I accomplished something. There’s no doubt in my mind that setting goals has allowed me to realize our dream of living in Canada as a family. I am still surprised how powerful the habit of writing goals every single day could be! Of course, none of it would have been possible without the grace of God.
This year though, I was a little disappointed as I was not very clear on my goal. I set a 2021 goal, and it was very generic. I realized that those are not even goals! What I had set for 2021 was merely pure INTENTION. Why so? Because I did not set a clear timeline to achieving those. (Was I too caught up with noises around me) Every goal should have a timeline attached to it. Otherwise, it’s simply not a goal but an intention. And that’s the difference between good intentions versus setting clear goals.
Here are what I’ve set for the beginning of 2021:
1. Pray with all my heart and soul
2. 10-minute exercise daily
3. CELPIP CLB 10
4. New Skill
5. Increase bonding time with my husband
6. Increase bonding time with my daughter
As far as SMART goals are concerned, the list above are not goals and not entirely smart. However, I don’t want to demean what I wrote down and never want to discredit myself. I should still give a good pat on my back and acknowledge that I had set 2021 GOOD INTENTIONS.
Do you write your life goals? It’s a known fact many people don’t take the time to write their goals and merely saying out loud their pure intentions and resolutions for the year. So having set and written down those good intentions in this challenging year to me is better than not having to set anything at all!
So, what’s the difference between setting good intentions versus setting clear goals?
Setting good intentions is synonymous with laying motives and probably planning for something to happen or occur. When setting good intentions, you can cover various areas of your life such as spiritual, financial, physical being, career, marriage, etc. Setting clear goals, on the other hand, covers the same areas as good intentions. The only difference is that there is a timeline or due date attached to every intention.
How I would make my 2021 good intentions become clear goals, I would have written down the following instead:
1. Strengthen my spirituality by committing alone time of daily morning prayer and gratitude for at least 15minutes
2. Become more physically fit by exercising at least three times a week either through running, 30-min walking, or playing tennis
3. Complete CELPIP test and achieve CLB 10 score by 30th July 2021
4. Learn to play tennis and be good at it this year and commit at least three times a week to practice.
5. Obtain my driver’s Learner license by 30th December 2021 by reviewing daily for 15 minutes and taking the test after three months of review.
6. Increase bonding time with my hubby by spending at least one hour every night, having great conversations over wine, or watching favorite TV shows/movies.
7. Increase bonding time with my daughter by committing to writing down in our journal together and sharing our thoughts and feeling over the journal prompts every Monday, Wednesday, and Saturday until we maxed out all the journal pages for this calendar year
How to turn your good intentions to 2022 realistic life goals?
To start, it is best to think about your good intentions first in all the areas of your life you want to improve or make changes. Then, once you have written down your good intentions for 2022, it would be easier to turn and write down your clear goals surrounding each intentions. Again, setting clear goals should have a timeline or a deadline to it.
CONCLUSION:
Setting good intentions and clear goals is as easy as:
1. Set good intentions that you want a change or want to improve on in your life and write them down. See my example above. I suggest covering your spiritual, health, financial, and relationship.
2. Set clear goals to cover all your good intentions with a realistic timeline and a due date.
Have you set good intentions and clear goals this 2021? Are you satisfied with the outcome so far? If you haven’t written down your good intentions and clear goals for the year, I encourage you to begin now and build the habit of doing so. We are closing the year 2021 soon. It’s time to review our life closer. It’s never too late to set good intentions and clear goals. Begin 2022 goal setting, and I bet you’ll have a great kickstart in the coming new year 2022! Good luck and all the best!
This post may contain affiliate links, which at no cost to you, Wanderer Mom earns a small commission from if you click through and make a purchase. Please read full disclosure here. Thank you for choosing to support this blog, Wanderer Mom.
Are you excited about 2021 Thanksgiving Day as much as I do? It will be our second time to celebrate Thanksgiving Day in Canada. Last year’s celebration was a memorable one as our family just moved to Vancouver in October. Hubby took the time to bake our very first turkey to celebrate Thanksgiving Day at home. We didn’t know anyone yet at that time, and we celebrated with only the three of us. Being together with the family is more than enough blessing.
In Singapore, the celebration is very similar to Mid-Autumn Festival. It is one of the most important holidays among the Chinese, where family and friends gather, and there is a colourful display of lanterns that symbolize the lighting of the path forward. One thing which is memorable for me was the tasting of a variety of flavours of delicious mooncakes.
This year’s Thanksgiving Day, we want a simple yet memorable celebration. After all, it’s about being grateful no matter the circumstances we all face. Blessings abound and multiply when we celebrate with gratitude in our hearts.
Looking for some FALL outerwear, Friends & Family Save an Extra 25% Off Site-Wide with code Friends25. Limited Time offer Only! (Oct 29 to Nov 11, 2021)
How to make your 2021 Thanksgiving Day more meaningful and more fun?
What would make this Thanksgiving more meaningful is to reflect on things around us. It will be more fun if there are interesting topics in a conversation with your family members and friends while enjoying a great feast.
I thought of an activity that’s not exactly unique but hopefully would make each family member and friend happy.
Here are the activities you can do to make your Thanksgiving day more meaningful and more fun:
1. Cheery Q
a. Prepare thought-provoking questions (see the sample questions below) on a colourful piece of paper
b. roll the paper
c. put the rolled paper into a glass bowl or cute box
d. let each of the family members and friends pick one rolled paper and answer the question.
e. After answering each question, let everybody cheers!
Try these three questions: These three questions will make you pause and reflect this Thanksgiving Day:
What are you most grateful for this year? Name three things, persons, or happenings.
What would you commit to keep or make the rest of the year more bountiful and happier?
If there is one word or phrase you would give yourself, what would it be and why?
2. Sing-a-long
In the Philippines, a sing-a-long is a usual activity during the festive celebration. For this Thanksgiving, have everyone prepare to sing a song and dedicate it to the person in the room they are most grateful to.
3.Prepare food and write a simple letter or note with it
Whether you are preparing Thanksgiving for everybody or attending a friend’s Thanksgiving dinner, include a simple letter of thanks or gratitude while handing over the food. A simple gesture would surely bring a smile to the person receiving the food. And who says you can only do this during Christmas or birthday?
Happy Thanksgiving to all! How do you celebrate Thanksgiving Day with family and friends? Feel free to comment here. I would love to read about some fun activities you do. cheers!
Looking for some FALL outerwear, Friends & Family Save an Extra 25% Off Site-Wide with code: Friends25. Limited Time offer Only! (Oct 29 to Nov 11, 2021)
This post may contain affiliate links, which at no cost to you, Wanderer Mom may earn a small commission if you click through and make a purchase. Please read full disclosure here. Thank you for choosing to support this blog, Wanderer Mom.
There are a few matters you need to do in your first two weeks in Canada as an international student or a new immigrant. First and foremost, congratulations as you made it to Canada! A new life in Canada awaits! Before you begin an exciting journey as a newcomer in Canada, you need to tackle a few tasks first, and I highly recommend completing these things during your first two weeks in Canada.
Disclaimer:I am not an immigration consultant or lawyer. I am simply sharing information based on my personal experience and research. Please do your own diligence as information contained may be outdated or may not be applicable to your personal circumstances.
Here are seven things you need to do during your first two weeks in Canada:
1. Get a SIN number
A SIN number is a short-term for Canadian Social Insurance Number. It is a nine-digit number that a government will issue to you as a form of identification. It will be associated with you when you transact in government agencies. Once you have this, please keep it in a safe place and never show or give your SIN number unnecessarily. Treat your SIN as one of your precious personal ID much like your passport.
Why do you need a SIN number?
To give you an idea of why you need a SIN number, I have listed down below some of the scenarios that you will require a SIN number:
• You will need a SIN number when you apply for a job. If you plan to work part-time while studying in Canada, the employer will ask you for your SIN number for tax and insurance purposes. You need not give your SIN number when you are only being interviewed or applying for a job. However, once you get a job offer and accept it, you will have to provide your SIN number to your employer. • You will need to provide your SIN number when you file your taxes and or apply for personal benefits like employment insurance • Some banks ask for a SIN number as part of their requirements when opening a bank account with an interest or an investment account.
You can obtain your SIN number from Service Canada. You may find a Service Canada upon your arrival at the airport and directly apply there if you have ample time. Otherwise, you may visit other branches near your place and apply in person. You may also apply for a SIN number via online and mail application.
What are the requirements when applying for a SIN number?
The requirements for online, by mail, or in-person application for SIN numbers are here.
Have all your primary documents, secondary documents, and supporting documents ready.
Just a note here as it can get confusing with a lot of information, for temporary residents (Study Permit, OWP holders),
the primary documents issued by IRCC or CIC include:
-Study Permit
-Work Permit
-Visitor Record
Secondary document example includes:
-Passport
Supporting document example includes:
-marriage certificate or record of solemnization of marriage
It was the very first thing that we did on our first day in Canada. You need to have your local cellphone number and a data plan to prevent the high cost of roaming services. Never rely on WiFi alone. You will need a data plan, especially when navigating unfamiliar places. For sure, you will need Google as your friend. Also, you will be asked for a cellphone number when you apply to open a bank account. So, make sure you have your local cellphone number as one of your priorities on day one. Also, you would want to immediately update your loved ones and friends back home of your new number in Canada.
Can you bring your own phone and buy a sim card?
The simple answer to this question is, yes, you can buy a sim card with a prepaid plan.
My first local cellphone number was a prepaid too from Chatr. My monthly charges back then were $35 with 2 GB of data at 3G speed. It also includes unlimited Canada-wide talk time and unlimited text to Canada. I find Chatr considerably offers lower than other Canadian mobile phone providers like Roger and Virgin Mobile. Other known mobile providers are Fido, Telus, Freedom mobile.
It’s Fall season, get up to 50% discount from Reebok’s Seasonal Sale. Use my coupon code: FALL
How much does a mobile data plan cost in Canada?
A mobile data plan probably costs around $50 per month to $60 per month or more. Price varies with mobile plan providers.
If you are an international student, you may want to start with at least a 5GB plan that will allow you to use and check your e-mail accounts and social media accounts.
In general, the Canadian mobile phone plan is pricier than other countries. I came from Singapore and used Circles. I got a 20GB for only $18 per month with a free 100 minutes plan talk time and a free caller ID. But this type of mobile plan seems unlikely here in Canada. So be careful in your data usage as it could cost you a lot if overused.
TIP: Check the mobile data provider’s coverage in your area first and the place where you will be frequent. It would be good to research as some mobile data providers might not have good coverage in specific areas or locations. For this reason, I opted for a prepaid plan first rather than a contract plan. While it is not easy to change mobile providers, it gives me the flexibility to move to a new provider when I am not happy with the coverage or want to do so for other reasons such as price and features.
A contract plan, on the other, is a plan where you are tied to pay for a minimum of one year or two years, and you are paying the monthly charges. Choose a mobile plan that is most suitable for your monthly budget, useability, and functionality.
3. Open a Canadian bank account
As an international student, you can open a bank account in Canada. Your spouse or common-law partner can also open his bank account even if he has no job yet.
Types of Canadian bank account you can open:
a. Chequing account – this type of account usually comes with a debit card. In most cases, many people utilize chequing account for their day-to-day banking needs. When you open an account, you will be issued a debit card associated with your chequing account. Most Canadian banks offer a promotion for newcomer or international students. Bear in mind, some banks have associated monthly fees for a chequing account, and some waived the monthly charges for the first year. Be sure to check this out before signing.
b. Savings account – A savings account offers a slightly higher interest rate than a chequing account. If you intend to save up a portion of your money, you may opt to open a savings account as well and gain from a higher interest offer.
c. Investment account – As an international student, this may not be your priority yet the first time you open an account. However, you may be thinking of apportioning some of your savings or money to an investment soon. In this case, it is best to schedule another visit to your bank and talk to a personal banker to assist you.
Commonly used banks for international students that may offer lower monthly transactions fees are:
Can International students apply for a credit card in Canada?
As an international student, you can obtain yourself a credit card in Canada. Most banks offer promotions for international students. Owning a credit card is an important decision. Bear in mind that a credit card allows you to borrow money from the bank, and you will have to pay for the borrowed money with interest.
Having a credit card in Canada is essential if you are thinking of migrating here for the long term. It will help you build your credit score early on, and this is crucial if you are planning to buy a house and apply for a mortgage soon. With a high credit score, you will get easy approval on a loan or mortgage. So, use your credit card as a tool only to build up your credit score.
Our banker mentioned that it is advisable to utilize and not exceed more than 30 percent of your credit limit each month to build a good credit score.
Disclaimer:I amin no way a financial expert or banker. I am merely sharing based on my opinion and personal experience. It is best to consult your bank to get accurate information and financial advice.
TIP: Take advantage of the high rewards offered by credit card companies. Watch out for some cashback rewards and ask your bank how you can obtain them. Some banks offer up to $300 cash back when you apply for a credit card for the first time. You can go back to the Canadian banks I mentioned here and check if they have such offers.
4. Register your son or daughter to school.
It’s one of the priorities my husband and I settled during our first week in Canada. Initially, we registered our daughter to TCDSB (Toronto Catholic District School Board).She was turning grade four then.
Choose a school that is walking distance from your home so it will be convenient for the whole family as it can be challenging during wintertime. If you are in Toronto area, you can find a school in the previous link provided here or simply search Google maps on nearby schools around your home/apartment.
What are the requirements to register your child in public school (in this case at TCDSB):
It is best to contact the TCDSB directly here and contact their staff who handles international students and ensure all requirements are complete before heading down. They usually accept registration by appointment only. You can find the TCDSB contact here and hover down to their homepage footer under Admissions/Registration.
We were required to produce the following documents for the school registration of my child:
a. Proof of Identification (child and parents) b. Study Permit (child) c. Work Permit and/Study Permit of the parents d. Proof of Address
e. Immunization Record f. Report Card from the previous schoo
5. Familiarize yourself with your local city, neighbourhood, and local services.
Once you have your local mobile number, time to go out, obtain a map, and navigate your local area. It can be a little intimidating if you are in an unfamiliar place. So, the first thing you need to do on your first week in Canada is to get familiar with your local surrounding and the local services available. Figure out the nearest grocery shop, pharmacy, school, medical clinic, etc.
Familiarize yourself with the places you will need to go frequently and figure out the fastest route when available. If you researched online and still find it hard to figure out your way, there is no harm in asking the officer-on-duty in the train station or bus station. You may also call their hotline number. It is better to know your way to commute rather than get lost.
In your first few months in Canada, you will need to commute unless you choose to obtain a driver’s license soon. In both cases, you still need to be familiar with your local city area.
If you are Toronto-based, you can buy the Presto Card monthly transportation pass for use on the train and bus. If you are Vancouver-based, they call the train pass Compass Card.
6. Settle Your Health Card and Health Insurance
If you are coming to Canada as an international student, you would have already paid your health insurance together with your school tuition fee before your arrival. Otherwise, you would need to settle your health insurance and that of your dependents coming with you. It is recommended that you get a separate health insurance for the first 3 months for your dependants from another insurance company if your OWP is not working yet.
You can also add your dependents in your school insurance if you want to. Check your school coordinator or your school insurance provider for details. In my case, I opted in getting from another insurance company. Anyway, all these will save you the trouble of incurring unexpected medical costs in case an emergency happens. (knock on wood)
If your OWP (Open work permit holder) already got a job offer of at least six months in length by contract or full-time employment from a Canadian employer, you as the SP holder and your child dependent will be able to obtain the health card. In Toronto, they call it OHIP, and here in Vancouver, they call it MSP. The health card is essential as it will allow you and your family to utilize the medical insurance benefits from the government.
You may be able to drive around British Columbia up to 90 days if you are holding a driver’s license from other Canada provinces and/or from another country. Do inquire and check how you can obtain a driver’s license at their website here.
It is recommended to obtain a driver’s license or convert your home country driver’s license as soon as you can and even if you have no intention to buy a car yet. If you are living in Vancouver city and the train station is just a few blocks away, you may find it unnecessary to buy a car. But if you are living in a suburb area, having a car would be a convenient option as traveling by bus and train in and around Canada in general could take a huge amount of your time.
In Summary,here are the seven things you need to do during your first two weeks in Canada as an international student or a new immigrant:
Get a SIN number
Get a local sim card and mobile data plan
Open a Canadian bank account
Register your son/daughter to school
Familiarise yourself with your local city, neighbourhood, and local services
Settle your Health card and Health insurance
Apply for a Driver’s License
Do youhave other “to do’s” that are not listed above. Feel free to share in the comment box so that many international student families will benefit.
This post may contain affiliate links, which at no cost to you, Wanderer Mom may earn a small commission from if you click through and make a purchase. Please read full disclosure here. Thank you for choosing to support this blog, Wanderer Mom.
Have you ever thought of how you can build a better after-school routine for your tween or kids such that they don’t end up just playing computer games or watching YouTube funny videos? It can be challenging for parents and tweens to find other ways to enjoy their time productively when they have no homework from school.
Here I share some of the after-school routines you can follow for your kids or tweens so they can be happier and at the same time feels more connected with themselves and the rest of the family members. These routines will help build a sense of responsibility, life skills, and a good attitude as they grow older.
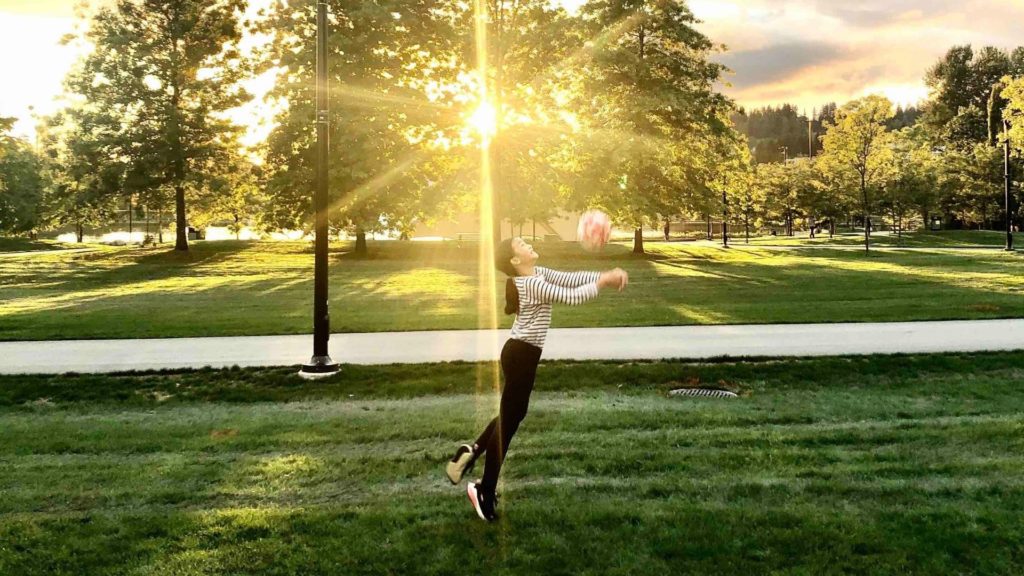
1. Exercise or Play Together at the Park
Take the time to bring your tween or your kid to the playground or the park during non-PE days. Kids do play at school, but due to certain Covid restrictions, they don’t have much time to play with friends as they want to. Take the afterschool opportunity to be with your tween, playing whatever games they want. My tween likes to play volleyball at the park. At times we also play basketball. You will know your tween well by being with them and doing things together that make them happy.
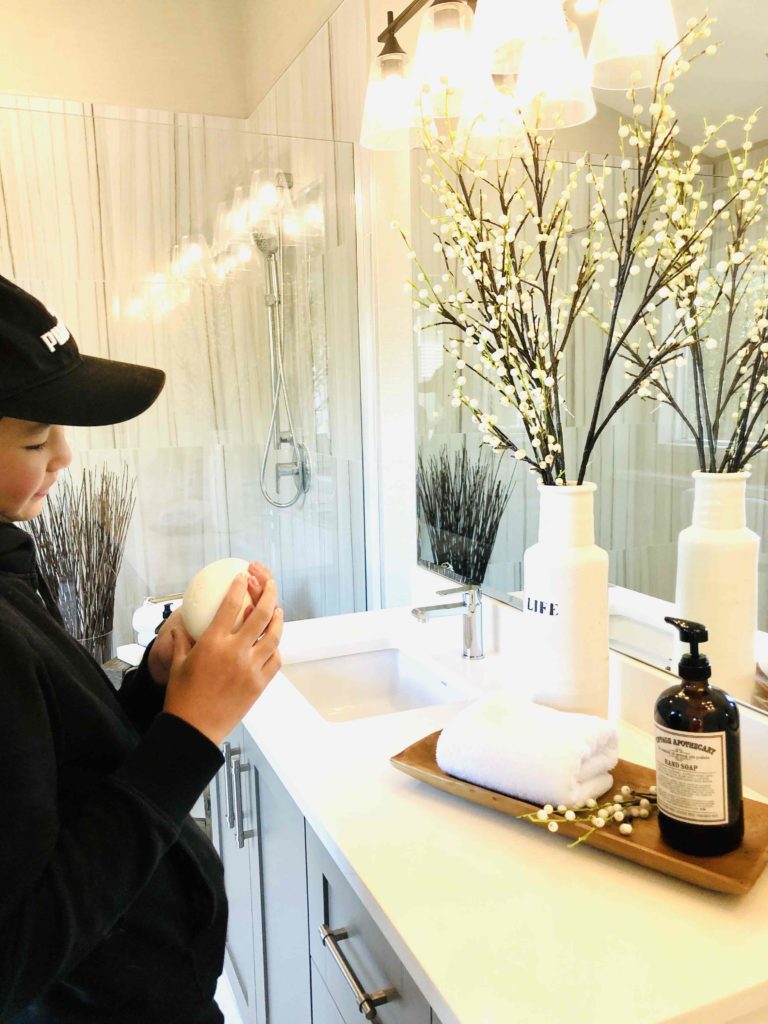
2. Take a Good Bath
Taking a bath is such a boring routine for some kids. You can make it more interesting by letting them soak in a bubble bath for a few minutes longer than usual or prepare a warm bath for them with their favourite scent. You can have them prepare it or prepare together; whichever way is enjoyable. Having a variety of soap scents is something new and will be more fun and enjoyable for them. It will also help them relax their muscles and get into a positive mood for the rest of the night.
3. Get in the Habit of Writing Together in the Journal
Who says that only adults can do journaling? Back in our old days, we probably call journaling like writing in the diary. Although, it was then merely a colourful book where you could write down the memorable and fun things that happened during the day. Nowadays, there are a lot of journals available for tweens or kids. One of the things we do together is writing in the “mother and daughter” journal. I share a little more about other ways to meaningfully connect with your tween daughter and its benefits here. My tween also has another solo journal that has thought-provoking prompts in them. Writing a journal promotes self-awareness, gratitude, and personal growth.
4. Teach your Tween to Clean Up Her Lunch Box and Snack Box
Often, it is always the mother who does the cleaning and washing of the lunch box. Never feel guilty about teaching your kid or tween at a young age to care for her stuff. Teaching them how to soap and wash their lunch box is a great way to be more responsible. Let it be part of her house chore is a perfect example that families ought to help each other willingly.
5. Have your Child Participate in Virtual Leadership and Training Sessions
Many non-profit organizations are more than willing to help ease the burden of being locked down at home. As such, they offer several virtual training and leadership sessions with different age groups. The sessions are not daily and hold once or twice a week. Google search non-profit organizations in your vicinity that offer those type of activities that helps build child’s resiliency, emotional intelligence, and life skills. One of the organizations that offer similar activities for varying age groups is the Low Entropy Foundation.
6. Help Your Child Develop the Habit of Reading a Book
Getting your child grow the habit of reading will improve her vocabulary and reading comprehension that will ultimately improve her creativity and critical thinking skills. Apart from playing online games like Minecraft Education, you can provide inspiring and educational storybooks, non-fiction, and fiction books that your tween finds appealing. Sometimes, nudging them to read if they don’t like, could be challenging, but once you make it available for them and see the book fascinating, they would pick it up and start reading. There are many available free books you can borrow for your child in the community library. If you are living in the tri-cities of Lower Mainland, Vancouver, you can check out the free books from the little library. For the more techie type and if you want to monitor your child’s progress, there are several great reading apps which your child can use anytime and anywhere.
7. Let your Child/Tween Prepare Her Clothes & Other Stuff for School
Your child feels happy when they can wear clothes they like, and they feel empowered if you let them decide what to wear for school. Let them prepare their clothes (or uniform), socks, and whatever school stuff to bring before going to bed so that they will not rush the next day. Instill in them the habit of preparing early for times like school days. They will learn the attitude of always preparing early and ready to seize the day as they grow up.
8. Pray together
Praying together shows a great perspective to your tween. At a young age, they may not have a strong sense of faith yet. Engaging them every day in praying together and seeking God even when they don’t completely understand is a worthwhile pursuit. Praying together can be a step in teaching them to acknowledge God and honour Him as they grow older. Never skip this part of your child or tween’s routine.
Having a good afterschool routine for kids is a lifesaver both for the kids and the parents. Afterschool routine makes your kids happier and connected. As a summary, these are the eight afterschool routines you can follow:
1. Exercise or play together at the park.
2. Take a good bath.
3. Get in the habit of writing together in the journal.
4. Teach your tween to clean up her lunch box and snack box.
5. Have your tween participate in virtual leadership and training sessions.
6. Help our child develop the habit of reading a book.
7. Let your child/tween prepare her clothes & other stuff for school.
8. Pray together.
Do you have other after-school routines that are effectively helping you and your child become happier and more connected? I would love to read your comments here.
This post may contain affiliate links, which at no cost to you, Wanderer Mom may earn a small commission if you click through and make a purchase. Please read full disclosure here. Thank you for choosing to support this blog, Wanderer Mom.
When you’re pressed for time, you probably are searching for CELPIP tips and tricks to help you obtain a high score on the exam. Of course, you know that you need to give time to prepare and review. I took the CELPIP general exam end of June this year as a language proficiency requirement for my express entry profile to obtain my PR here in Canada. If you are like me vying to get at least a 9+ score in CELPIP but you cannot find time to review because of all the reasons you can think of, you might find my advice and tricks can work for you.
Probably like me, you will find it very challenging to do the CELPIP review especially when you have a part-time or full-time job weekdays and you have a tween or kids to look after. Work and chores are endless. However, if you cannot find a specific time for the CELPIP review, you might find that days are passing by. You might find yourself rushing to review for an exam that can cause you and your family a future.
Here I share the easy tips, tricks, and the best CELPIP advice on how you can achieve a high score even if you have no time and/or super busy.
Please know that these CELPIP tips and tricks may or may not work for you as I know that we all have different circumstances in life. I am simply sharing my CELPIP experience and my own pointers and tricks as they did work effectively for me. By understanding and working on these tips that I will share, I achieved 8 in Listening, 9 in Reading, 8 in Writing, and 10 in Speaking tests.
My hubby on the other hand, got a better score. He scored 11 in Reading and Listening, 9 in Writing, and 8 in Speaking. I shared my CELPIP General Test score not to brag but to prove that it is possible to achieve a high score even if you think you are busy and have no time. I did not get all 9 but imagine if I allotted at least a month in seriously reviewing for it, I probably would have scored all 9+ or 10+.
I had only two weeks to seriously review before my CELPIP test. Why? Because I always reason out to myself that I am tired from work, I need to prepare dinner, I deserve a break, I will not be able to focus when I feel tired. Stop the excuses! It’s time to get down and be serious in studying for your exam.
Get done with your review for CELPIP Test even if you have no time and are super busy with these tips and tricks I followed:
1. Get a Notebook and write down your CELPIP Goal Score.
It is great to achieve your goal. If you cannot write it down in your notebook, have it on your mobile phone in notes. After you write down your CELPIP score goal. Write down WHY you need to have that score. Why is it important? This will remind you that reviewing for CELPIP is equally important as brushing your teeth before going to bed. You need to read your goal every single day or night to remind yourself of your commitment.
2. Decide the date, time, and place for your CELPIP exam and book it!
You can directly book here. Previously, I delayed my exam date. I reasoned I would just waste my money if I booked it early without practicing and reviewing for it. The truth is, you and I will never be ready for it. It will be much easier to get yourself focused on the exam if you already committed to doing it, which means you already have a date, time, and place for your exam. When you already booked it, you know you will be committed to it no matter what. It’s not the other way around.
3. Follow a course of CELPIP review program from one or two people only.
There are tons of free CELPIP resources and CELPIP mock tests for Listening and Reading on YouTube and the internet. All of them are sharing their format to get a high score in CELPIP. You will get overwhelmed if you keep on jumping from one resource to another each time. It may even intimidate you if you keep on searching for the best tricks or format. And so, in my case, I just consistently follow two people on YouTube. I find their content helpful. If you are interested, here are their YouTube links. The other Youtuber who provides CELPIP Writing & Speaking mock tests is here. Please know that I am not in any way affiliated with them. I just want to share because their way of teaching works effectively for me and it might work well for you too.
4. Take the free 2 ½ hours CELPIP Practice test.
I got a free practice test from Paragon Testing because I scheduled my exam from them. Before you bombard yourself with YT videos, I suggest that you take a free training test first. This will help you gauge the areas you would like to improve. In my case, the Speaking Test is my weakest. Therefore, the majority of my review time is granted to improving my speaking skills. But guess what, I got a score of 10 on my CELPIP exam! You see, it pays to focus on what you need to do (first and foremost). Imagine if you could allot your review time well on each module. I am sure you will do very well.
I either block 30 minutes before I go to bed or 30 minutes in the morning right after I pray. Those are the only time that works best for me. I could only review CELPIP when everything around me is peaceful, which means everyone is sleeping or not at home. A time with no destruction or anything similar to that. So, find a time that works best for you every day and block it on your schedule on your phone. Remember to set a reminder alarm for it, and there is no way for you to neglect it.
6. Watch English news (CBC, CTV, CNN, and others too).
The good thing about watching the reports is that you can do this while spending time with your husband or having dinner. The idea is to get used to hearing a native English speaker’s tone of voice and learn unfamiliar colloquial and local terms.
7. Listen to English Podcast.
Whether you are driving or commuting to work, I am sure you have at least 20 minutes or 30 minutes listening to your favourite Podcaster, right? The more you listen to native English speakers, the more you become familiar and comfortable hearing them. Repeat out aloud of terms you want to remember or repeat silently if you are commuting. Hearing English speakers and how they speak, react, and comment naturally on conversations will support you to become more confident along the way.
8. Read the online articles and news on broad topics such as climate, politics, education, etc.
Instead of browsing through your Facebook and Instagram account, why not open Yahoo News or Bing News or read worthy articles online. You don’t need a lot of time for this. You can spend time reading for at least ten minutes, and the good thing is that you can read the news while commuting to and from work.
9. Have a list of Canadian local terms handy.
Use idioms to score high in your CELPIP test. Download the free pdf of the most commonly used idioms by Canadians here. You can practice using those terms while doing your daily tasks. And you can only practice it when you are mindful of your CELPIP goal. So, when you know you cannot allot a 30-min review before going to bed, you need to make some adjustments to review without having to sit down in front of your screen.
10. Take this mindset with you: “CELPIP Language Tests are a great way for me to improve and adjust to the Canadian life”.
If all or anything, having the right mindset of why you should do well and get a high score for CELPIP is this reason. Your language proficiency tests don’t end after taking the CELPIP exam or IELTS exam. If you’ve decided to live and migrate here in Canada, you have to get used to English because you are in an English speaking country. So why not, take this exam as a way to prepare yourself on the real life out there.
Is CELPIP test hard and how much time do you need to review for it?
The answer to that really depends on the level of your readiness for each module and how well you prepare for your test. The ideal length of time for CELPIP test preparation would probably be at least one or two months.
I will not recommend that you review half a day or the whole day one week before your test! For me, it will not be effective at all. The intention of why you need ample time for review is to get used to the kind of questions and answers, find the most effective way to answer them correctly with the correct format that will get you a high score. The intention of the review is for you to remember the tips, tricks, and structure. That way is much easier for the brain to store all the information you watched in your subconscious mind. This is especially true with CELPIP Speaking and Writing tests.
Reviewing for the CELPIP exam need not be overwhelming and time-consuming for you. You have a gazillion of tasks to do apart from doing a review. But you can get better at preparing and improving every module of the CELPIP exam when you consistently follow your CELPIP goal and review the commitment outlined above. I hope the tips I shared here can help you.
Do you have any tips and tricks that can help our readers get a high CELPIP score? Or do you have other questions concerning CELPIP that you wish to learn more about? Feel free to write in the comment box.